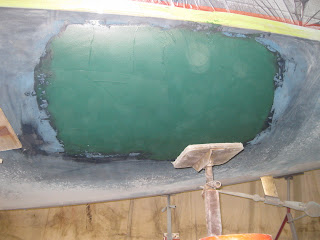
The nice part about fiberglass is that it is really light and really strong. The challenging part about fiberglass is that it is really strong. That means sanding is a challenge. You are going to want to use the right tools. For our rough sanding, we use an air powered 8” ‘mud buster’ with a Hook It disk.
The filler we used is a 3M product – 5816 Milled Fiberglass filler.
This filler is great because it has strength with the milled fiberglass in it and it is a polyester base with cream hardener, so it is fast curing and you can apply several coats in a day and grind between coats, plus it is water proof and can be used under the water line
We use air powered tools for 2 reasons. The first and most important is that they are lighter. In our current job, we are working over our head so weight is key. The other reason is that since it is air powered and our compressor is 240 volt 3 phase, we are using a lot less electricity.
Once we started the grinding process and removed the big highs, we brought in the cardboard templates we made before we started the demo phase of the project. This gave us a rough guide in our quest for the perfect repair. It also provided a good, cheap tool for constant checking on hull shape.
For the first pass, we used a 24 grit disk to knock down the big highs and get a general rough surface started.
This was a fairly fast process and set us up for the 40 grit disk, which we used to bring the perimeter of the new glass close to the level of the surrounding gel coat. In the process of grinding, we took out the highs and we also were able to detect our lows.
Once this was accomplished we were able to start the long process of filling in the repairs.
We applied the filler to the lows. In our case we had some aft and some in the middle. We started with the lows aft. When we had them filled, we used 40 grit disks on the mud buster again and ground this patch down.
We then spread filler into the low spot in the center of the repair, let it set up and then ground that down.
Now we have the two principle low spots starting to take shape and follow the contour of the hull. I repeat starting. This is key because at this point we can start to fill in the whole repair and work toward a uniform surface that is ready to fair.
Next we covered the whole repair with a uniform coat of filler, let it set up
and came back with the 40 grit and prepped it for fairing.
Next is fairing


No comments:
Post a Comment